Goals

Small Big Business and Technological ideas,thats guides you to your future Entrepreneur success.

Thursday, August 18, 2011

P500 TO 3K SMALL BUSINESS PINOY STYLE


Are you wondering what businesses can be started from P500 to P3,000? If you want to put up your own business but deterred by the thought that you would need a big capital. Well, stop it now. You can find lots of businesses that could be started from P500 to P3,000 or less. You only need to look around and find the need.

There are many successful Filipino entrepreneurs who started their business in a tight budget and they have proven that a little cash can go a long way. What they only have is the right attitude, patience, hard-work, initiative and persistence. They never stop learning and innovating the business. They may not have thousands or millions of pesos to use but they continue to find ways to grow their business. And the good thing when starting in a small capital is that it allows the entrepreneur to learn the ropes of the business with minimal risk before going into big business ventures in the future.

So, whether you only have P500 or P3,000 in the pocket, now is the right time to start your dream business.
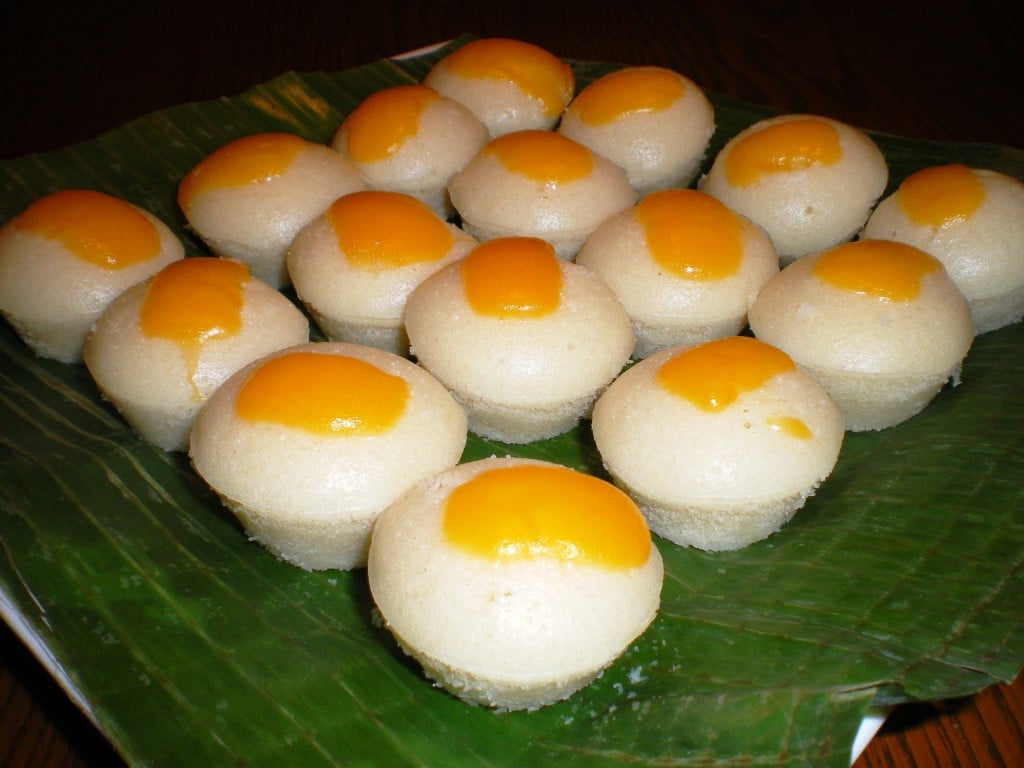
1. Puto
This all-time favorite Filipino delicacy is very easy to make and sell. You may even charge a higher price for flavored puto, but it will still be affordable to the masses.

Startup capital: P500
Procedure: Learn how to make puto here.
Tip: Puto is best sold in packs of 12. If you offer flavored puto, your best bet is to offer a combination of flavors in one pack since people rarely buy too much of one particular flavor.

2. Selling Ice Cream
Everybody loves ice cream, no matter what the season! This makes a perfect startup business.

Startup Capital: P1,000
Procedure: Learn how to make Ice Cream here.
How much you can sell it for: You may actually sell this 4-gallon ice cream at around P1,500 wholesale for children’s parties or small gatherings within your neighborhood. But if you pack it in small containers, you may sell it at P250 per half-gallon or P8 per scoop.

3. Banana chips
Practically anyone can be a customer, so your selling possibilities are endless. Plus, banana chips are highly in-demand overseas. Makes a perfect presents to loved ones abroad.

Startup capital: P500
Procedure: Learn how to make banana chips here.
Time to finish: 1 to 2 days. Your earnings will depend on how much you can cook, and it takes one day to cook 30 kilos worth of banana chips. If you want to make a sweet banana chips, you have to cook them a second time the following day.

Tip: Remember to store your chips in an airtight container so that they do not lose their crunchiness.

4. Selling Polvoron
Polvoron is a much-loved Filipino delicacy, and it has become a favorite gift to give to friends and family here and abroad.

Procedure: Learn on how to make polvoron here
Startup Capital: P500 for ingredients for your first 50 pieces and materials such as measuring spoons, Polvoron molder, etc. (which you can reuse again and again)
How much you can sell it for: Plain polvoron can be sold for as much as P44 for a pack of 12, while flavored ones can go as high as P60.


5. Donuts
During special and holiday season, many people turn to food as a default giveaway item, and sweets such as donuts are always considered easy to give. You can also sell to friends and neighbors, tap coffee shops and offer donuts for concession, or accept orders by the dozen. Perfect for parties, birthdays, anniversaries and all other occasions.

Startup capital: P1,000
Procedure: Learn how to make donuts here.
How much you can sell it for: Add the costs of the ingredients and P15 for packaging and additional toppings or flavors, then multiply by two to get a 100 percent markup. Divide by the number of yield to get the per-piece price .

6. Homemade Fruit Preserves
The Philippines is teeming with tropical fruits, which makes it easy to make a variety of jams and fruit preserves. Since Filipinos are always in search of a good “palaman” (spread) for their breads, fruit jam is virtually a staple in every household. Also, makes a perfect presents or gift to your relatives overseas.

Startup capital: P2,500
Procedure: Learn how to make homemade preserves here.
How much you’ll make: You can opt to sell in bulk to stores at a 50 percent profit, or direct to customers with a 100 percent markup.

7. Siopao
Making and selling siopao is a good startup business because you don’t need to buy expensive equipment. Besides, there’s always a strong demand for this product.

Startup Capital: P650 for 80 pieces
Procedure: Learn how to make siopao here.
How much you’ll make: To have a good enough margin yet maintain a competitive price, you can add a 100 percent markup to the total production cost.

8. Chocolate Candies
Everybody loves chocolates, and they can be perfect as gifts. Plus, they’re very easy to make.

Startup Capital: P650 for 44 pieces
Procedure: Learn how to make chocolate candy here.
How much you can sell them for: You can sell the chocolates for P40 per box. You may even charge extra if you use special designs.


9. Fish Siomai
Siomai consumption is nowadays widespread and can be seen in many Philippine business food stalls and restaurants serving siomai either in steamed or fried with chili garlic dip sauce.

Procedure: Click this link- How to make fish siomai.
Startup Capital: P300 for about 140 pieces of fish siomai

10. Skinless Longganisa
Skinless longganisa, a Filipino-style sausage, is a popular viand that you can find in most dining tables of Filipino families. Longganisa comes in different versions from the different regions of the country, i.e. with vinegar like in Vigan, or with oregano like in Lucban.

Startup Capital: P500 to P1000
Procedure: Click here to learn How to Make Skinless Longganisa.
11. Perfumes and colognes
Everybody wants to smell fresh and good. Perfume/ cologne making is easy and fun to do, and your profit margins can be as high as 300 percent!

Startup Capital: P1,500 for 100 grams of perfume
Procedure: Learn how to make perfume here.
How much you’ll make: This formulation yields 12 to 13 roll-on bottles. Given this, your production cost will be around P115. You can mark up the product anywhere from 100 to 300 percent.

12. Aromatherapy Air Freshener
Aromatherapy air freshener not only let you breathe in oh-so-pleasant, reinvigorating scents in the air. They can also help you relax, lift your mood, banish your headaches and migraine–even drive away insects. You can sell your products through home-care stores, car accessories stores, or online stores, or offer them in sets as a gift pack.

Startup Capital: P1,600
Procedure: Learn how to make aromatherapy air freshener here.
How much you’ll make: You may package the finished aromatic fluid in 200 ml, 100 ml, 30 ml, or 20 ml bottles. A 355 ml bottle of room freshener is usually commercially sold at P370, a 7 ml pack of car freshener at P115. You can similarly price your product, or you may price it lower depending on your target market and overhead costs. In the case of your room spray, you may put in a 100 percent markup; the price would then be P200 per 200ml bottle.

13. Gift baskets
There will always be people and companies who prefer to give away an assortment of goods during the holidays. If you are creative and can produce stunning pieces, your gift baskets will be in demand.

Startup capital: P1,000 (excluding the items to be placed inside)
Procedure: Learn how to make gift baskets here.
How much you’ll make: Your production cost will vary depending on what you put inside the basket, however, a safe bet would be to add a 20 percent markup to the total production cost.

14. Stuffed Toys
Kids and adults love to cuddle these furry animals, so you have a wide range of buyers to sell to. Plus, with the holiday season ahead, it is easy to sell stuffed toys as gift items.

Startup Capital: Around P500
Procedure: Learn how to make stuffed toys here.
How much you will make: You can add a 100 to 150 percent markup to the production cost and sell each stuffed toy at P150 to P175.

Tips: Trace the patterns correctly. Cutting cloth that has been wrongly traced is a costly mistake.

15. Liquid Detergent
People are always looking for cheaper alternatives to commercially available items. Homemade cleaning solutions can be as effective as branded ones, and your target market who use them in large quantities everyday will appreciate their lower price.

Startup Capital: From P1,000 to P1,200
Procedure: Learn how to make liquid detergent here.
How much you can sell it for: To determine the selling price for your liquid detergent, add a markup of 40 to 45 percent to the total production cost of each bottle.

How to Make Liquid Detergent


Liquid detergent is easy to make for home or commercial use. This is an efficient way to save you from expensive laundry and liquid detergents and most of all it’s very effective. Most of the available ingredients can be easily bought in supermarkets or from chemical stores.

Materials needed:

- Sodium lauryl ether sulfate, or SLES, P58.50 per 500 ml
- Sodium chloride or iodized salt, P13.50 per 500- gram pack
- Cocodiethanolamide or CDEA, P72.50 per 500 ml
- Ethyl alcohol, P54.50 per 500 ml
- Water-soluble dye, P35 per 400-gram pack
- Benzalkonium chloride, P109.50 per 500 ml
- Degreaser, P30 per 120 ml
- Fragrance, P161.40 per 120 ml
- Distilled or de-ionized water, P14.19 per liter
(All available from chemical stores)
- Wooden or plastic ladle
- Medium-sized basin
- Kitchen scale
- Measuring spoons and cups
- Gas stove
- Pot
- 330 ml. PET bottles, P5.50/pc. Available at Cachetrade in Cubao, Quezon City.

Getting started:

1. Put 1.4 liter of distilled water in a pot and boil the water for 15 minutes. You have to use distilled water or de-ionized to avoid contaminating the liquid detergent mixture. Tap water has substances that can cause the mixture to eventually emit a bad odor.

2. While waiting for the mixture to boil, put the SLES (150 grams) and iodized salt (80 g) into the basin. Mix them thoroughly with the ladle until the iodized salt is completely dissolved.

3. Once the water has boiled enough and the salt has completely dissolved, gradually pour the water into the liquid detergent mixture.
Stir. Keep on stirring until the SLES mixture is dissolved. The liquid detergent mixture becomes foamy when stirred, which means that the SLES is being dissolved.

4. Now add to the mixture the CDEA (60 ml), benzalkonium chloride (0.01 ml), degreaser (40 ml), and the fragrance (10 ml). Don’t add the water-soluble dye and the ethyl alcohol as yet. The water-soluble dye (10 g) should first be dissolved in ethyl alcohol (60 ml) before being added to the mixture. And make sure that the fragrance and dye are properly matched.

5. After putting in all the chemicals, mix until everything is dissolved. Let the mixture cool until the bubbles subside. Then add another liter of cool distilled water. Once the mixture has sufficiently cooled down, the liquiddetergent becomes clear. You can now pour the finished product into the PET bottles. Cap the PET bottles containing the liquid detergent and set them aside. The yield of the liquid detergent mixture is 2.77 liters. Using 330-ml bottles, you can produce eight bottles of liquid detergent from it.

Source: entrepreneur.com.ph

Hand Made Gifts for All Occasion


Every Christmas, it has already become a tradition to give presents. This is the season of gift giving to your loved ones and to your friends. As Christmas is approaching, it is the time to start thinking of the things you want to buy or make as gift for your loved ones. It is important to think of some unique gifts as this will make it extra special. Your gift is not necessarily the most expensive, rather something not so cheap but has value and love that you put in it. Make it a point that your gift is something special. A gift that is uniquely made- a handmade Christmas gift.

Here are some handmade Christmas gift ideas that you can add in your list. (Note: description were taken from the source sites)

Handmade dolls- These are wonderful playthings and steadfast companions for children — especially when they resemble familiar people. These basic dolls have yarn hair and clothes fashioned from fabric scraps, which give them a rustic aura. Click “how to make handmade dolls“.

Sock Monkey doll- This free sock monkey pattern shows you how to make a classic sock monkey with a step by step tutorial. Click “how to make sock money“.

Silk Scarf- This one-of-a-kind silk scarf is the perfect gift for any fashionista. Click “How to make silk scarf“.

Knit Hat- Perfectly choreographed, the movement of yarn between two needles yields hats, scarves, sweaters, and mittens as if by magic. Click “How to make knit hat“.

Aromatherapy Air freshener- These wonderful aromatherapy air fresheners are perfect business idea for selling together as part of a gift basket, or individually as corporate gifts, door-prizes, or party favors. Click “How to make aromatherapy air freshener“.

Bead Jewelry- This is a creative and entertaining hobby that not only will have you produce unique, handmade items of jewelry, but will also be a great business and a source of gift ideas for family and friends. Click “How to make bead jewelry“.

Scented Bath Salt- Bath salts are a simple way to experience some of the same benefits in the comfort of your own bath. And when combined with the aroma of natural essential oils, the experience can be truly amazing! Click “How to make scented bath salts“.

Herbal Soap- a kind of soap mixed with natural ingredients, juice or extract and vitamins from medicinal plants. This is a perfect gift for women, men and teens. Click “How to make herbal soap“.

Felt Slippers- Homemade slippers of thick wool felt make a heartwarming (and foot-warming) gift. Click “How to make felt slippers“.

Papier- Mache Pull Toys- These animal pull toys pair a vintage feel with a modern look. Click “How to make papier- mache pull toys“.

Cupcake Towels- These cakes are actually towels that are exquisitely designed to look just like real cakes. Cupcake towels are the perfect innovative dessert souvenirs for any occasion. Click “Cupcake towels“.

Shirt- Pocket Quilt- This pocketed quilt, made from recycled shirts, will look sweet hanging on the wall of any child’s room. Click “How to make shirt-pocket quilt“.

Stuffed Animals- These petite stuffed animals-a Fair Isle lamb, a cable-knit chicken, and an argyle pig-are so cuddly and simple to make, you’ll want a menagerie. Click “How to make stuffed animals”.

Quilted Coaster Set- These coasters make a great holiday gift. Each takes about 15 minutes to complete, so it’s easy to plan on making a set of four or six for a generous gift. Click “How to make quilted coaster set“.

Chocolate candies- You can sold luscious chocolate candies and other chocolate treats to other people, or topackage as gifts for family gatherings, social events, for hard-working co-workers or friends. Click “How to make chocolate candy“.

Chocolate Chip Cookies- These Chocolate Chip Cookie Recipes hit list is a compilation of all kinds of different chocolate chip cookie recipes–some basic and traditional all- time favorites. These are deliciously mouth-watering recipes you’ll surely love! Click “How to make chocolate chip cookie“.

Black Apple Doll- A one-of-a-kind doll peeking out of a stocking on Christmas morning is a sight that’s sure to please children and adults alike. Click “How to make black apple doll“.

Etched Glass- Flea-market finds and dollar-a-glass specials can be transformed with monograms, stripes, and whimsical polka dots. Click “How to make etched glass“.

No- Sew Tote Bag- Why break the bank for a designer bag when you can easily make one? These fashionable totes are constructed with two surprising items: a roll of duct tape and a stapler. Click “How to make tote bag“.

Photo: marthastewart.com

How to make Gift Basket


Gift baskets are extremely easy to assemble, but the final result looks stunning – a true labor of love (without the ‘labor’). Suitable for any occasion, unique gift baskets can often be just the solution when you can’t decide on a particular gift item. You can use different shapes of baskets, with or without a handle, and the size depends on what you want to put into it.

What You Need:

* Basket – Sufficient for the items
* Cellophane – A roll or at least 1.5 to 2 yards or meters
* 2-3 Yards of wired ribbon or a ready-made bow
* Gift Tag with string to attach
* Twist tie, or rubber band to ‘gather’ the wrapping
* Items to insert in the basket
* Bag of individually wrapped candy

Here’s How:

1. Decide what the basket ‘theme’ will be first, then look for a sufficiently sized basket, and purchase all the items for it.

2. Cut 2 yards of cellophane and lay it on the table surface, right side down, and place the basket in the middle of it.

3. Arrange all items inside the basket; you can place a cloth napkin or paper doily in the bottom. Ensure that breakable items are secured or wrapped in cloth or tissue to prevent breakage. Position tall items in the center, with medium items on the outside, and small ones in between. Individually-wrapped candy sprinkled throughout the items, adds a nice sweet touch.

4. Gather up the cellophane, pulling up the short sides first, then longer sides, and secure with a long twist tie. A helper is great for this step.

5. Add the ribbon, making a nice bow with long curved tails. Or attach a ready-made bow. No need to remove the twist tie.
6. Attach the gift tag with string or tape it to the front cellophane.

7. If one of the short sides of cellophane is gaping, you may be able to adjust it by pulling gently on the top section, or secure with a small piece of clear tape.

8. Resist the urge to ‘play’ with the cellophane to get it just right – the idea is to gather the cellophane which produces an array of varying sizes of cellophane ‘petals’ – a unique ‘bouquet’. If the ‘petals’ are too long for your liking, you can trim them with scissors.

Tips:
1. Cellophane is sold in either clear, colored, print or festive. The clear with a small gold pattern is very versatile for any occasion.

2. Ready-made bows are great for taking the hassle out of making one, but make sure that the size is right for the basket – a large basket requires a larger bow. Likewise, don’t hide a small basket with an over sized bow.

3. Other items can be used instead of a basket, such as a casserole dish, pie plate, serving bowl, or gift box bottom. If the basket or container has very low sides, you may require a helper to gather up the cellophane.

4. The gift tag can be attached by a string from the gathered bow, or taped to the front of the basket.

To make it more unique, you can fully customized your gift basket according to the liking or theme of your clients. Here are some of the common gift baskets theme you can use.

Gourmet or Food Gift Baskets. These are the most common and popular gift baskets businesses and customers give to their friends, clients and family. A gift basket can be filled with candies, gourmet foods, coffees, biscuits, snacks, chocolates, wine, etc.

Bath and Body Gift Baskets- This is also a very popular, common items of these baskets tend to include towels, toiletries like scented soaps, shampoos, fragrances, oils, lotions, and new candles scents, even aromatherapy products.

Shower Gift Baskets- Perfect for either lifestyle changes like weddings or baby showers. Many entrepreneurs focus on a single market. For example, you can find a number of retailers selling exclusively baby gift baskets,weddings and birthdays.

Customized Baskets- A lot of your customers will want items in their gift baskets that are unique and not currently included in the item list. To make your gift basket unique, look for items that are hard to find, something unique and has a value. Your customer want a customized gift basket. Be sure to properly price your customized gift basket, given the added cost of shopping specially for the basket.

Sample Gift Baskets:
Fishing Gift Basket – Great Father’s Day Gift
Golfing Gift Basket – Great Father’s Day Gift
Super Bowl Gift Basket
Valentine’s Day Gift Basket – Chocolate Treasures
Super Bowl Beer Gift Basket
Christmas Gift Baskets From Stew Leonard’s
Dog Gift Basket for Christmas
Cat Gift Basket for Christmas
Classic Halloween Candy Gift Basket
Halloween Gift Baskets: How to Make Your Own

Marketing your Gift Basket

Make a goal for your business. Your goal should be to spread the word about your
business, create a signature image of your business, and convince customers that your gift baskets are of high quality and unique.

To be able to succeed in this business, make sure that your gift basket business is of high quality, unique and the price is affordable for everyone. You can market your gift baskets in offices, special occasions like Christmas, birthdays,weddings, anniversaries, etc.

Source: Mifflin, M. “How To Make a Unique Gift Basket – It’s so Easy”. About.com. http://housewares.about.com/od/giftideas/ht/giftbaskets.htm. Photo: mygourmetfoodgiftbaskets.com

Aromatherapy Air Fresheners


These wonderful aromatherapy air fresheners are perfect business idea for selling together as part of a gift basket, or individually as corporate gifts, door-prizes, or party favors.

Instructions:

1. Mix 30 drops (about 1.5 ml) of your favorite essential oil or blend (or try one of our special springtime or holiday scent ideas below) to 1 oz. of distilled water in a 1 oz. spray bottle.

2. Create a gift tag/label that tells the recipient how to use the bottle of air freshener, and the contents of the bottle (i.e. “Pine Air Freshener: contains 100% pure pine essential oil & water. Shake well and mist into the air as needed.”). You can also use these tags to write “To: ” and “From: ” information. Create your own unique tag, or download this sample gift tags (PDF file)that you are welcome to print and use on your own personal gifts.

3. Use ribbon, string, yarn, raffia, or pipe cleaner to tie your tag to the neck of the bottle.

4. To use the air freshener, shake well, and mist into the air as needed.

Springtime Scent Ideas
* Rose: Mix 30 drops of rosewood oil with 1 oz. pure, distilled water.
* Floral: Mix 12 drops orange, 6 drops rosewood, 5 drops clove, 3 drops cinnamon, and 2 drops jasmine with 1 oz. pure, distilled water.
* Romantic: Mix 12 drops palmarosa, 1 drop ylang ylang, 3 drops clary sage, 3 drops nutmeg, and 6 drops lime with 1 oz. pure, distilled water.
* Fresh: Mix 15 drops lavender, 10 drops geranium, and 5 drops Roman chamomile with 1 oz. pure, distilled water.

Holiday Scent Ideas

* Candy Cane: Mix 30 drops of peppermint oil with 1 oz. pure, distilled water.
* Evergreen/Christmas Tree: Mix 30 drops of pine, spruce, or fir oil with 1 oz. pure, distilled water (or try blending two or three of these oils together).
* Wassail: Mix 15 drops clove and 15 drops orange oils with 1 oz. pure, distilled water.
* Gingerbread: Mix 10 drops clove, 8 drops ginger, 7 drops cinnamon, and 5 drops orange oils with 1 oz. pure, distilled water.

For other great blends that you can use to create air fresheners, see the book 500 Formulas for Aromatherapy, by Carol Schiller & David Schiller.

Source and Photo: abundanthealth4u.com

How Make Simple Perfume

So, why many people love perfumes? people’s reason for loving perfume is because it makes them smell great and they seem to feel better about themselves. Not only does smelling great make a person feel good, but it will make a person feel attractive also.

Here, we will be looking at ways of how to make your own perfume so that you can produce a scent which is particular to you, and unlike any of those that you can buy either in store or over the internet.

Tip 1. It is better that you use measuring devices that allow you to exactly measure out the amounts of oils and solvents required. If you do not, the perfume you make may not be what you wanted.

Provided below, are a few easy recipes that you should be able to produce at home without too much hassle.

To start, you will need the following laboratory equipments: a 10kg weighing scale or kitchen scale, plastic cups, a stirring rod, a small beaker and a 1,000ml beaker, and a volumetric flask with cover.

The raw materials for this project are as follows: Prices may not reflect market conditions

* 70g triple deodorized alcohol (TDOH) at about P200 per liter
* 15g fragrance at P500 per 100g
* 5g muscol (MCL) at P400 per 100g
* 5g moisturizer (propylene glycol or PPG) at P250 per liter
* 5g distilled water at P10 per 300 ml.

For packaging, you may use either an atomizer bottle (spray) with a net content of 5 ml (P15 per bottle) or roll-on glass bottles with a net content of 10 ml (P16 per bottle). These are available at the Divisoria Market in Manila.

Procedures:

Step 1: To start, put all the raw materials-except the alcohol-in small plastic containers or beakers for weighing. The alcohol needs to be weighed last because it easily evaporates when exposed to air.

For accuracy, all of the ingredients must be weighed in grams, this is to ensure you are making quality scents.

First, weigh the beaker or the plastic cups on the weighing scale. Make sure to adjust the scale to zero before taking your measurements. While on top of the scale, fill the beaker or the plastic cups with the ingredients and weigh.

Step 2: When the materials are ready, pour the MCL into the beaker containing the alcohol. To make sure that the container of the MCL is thoroughly emptied of the MCL, rinse it with the weighed alcohol, mix the resulting solution with a stirring rod, then add the thoroughly mixed solution to the MCL in the beaker. Stir the contents of the beaker until the MCL is fully dispersed in the alcohol

Step 3: Add the PPG to the mixture and stir. Always stir each time you add another ingredient, and make sure to completely disperse the substance before adding another ingredient to the mixture.

Step 4: Finally, add the distilled water. To completely clean the empty container of the remainder of its contents, rinse it with water and add the resulting solution to the mixture in the beaker.

Step 5: Thoroughly mix all the ingredients in the beaker until the perfume solution becomes homogeneous, then get your bottles and fill them with the perfume. Label and package your perfumes as desired, based on where you intend to sell them.

This formulation for 100 grams of perfume yields 12 to 13 roll-on bottles.Your fragrances and perfumes must be kept in dry, cool, and dark places because light can adversely affect their chemical properties. As much as possible, use dark-color bottles for storage and packaging.

Each time you need to get some of your raw fragrances, transfer them into smaller bottles. This is to minimize their contact with air, which may adversely interact with them. By using a volumetric flask with cover, you can keep your perfume intact and well-sealed until you are ready to package it.

Other Perfume Recipes
1. Basic Recipe
All you need for this recipe is some water, chopped flower blossoms (use lilac or lavender if blossoms unavailable).

Place the flower blossoms in a bowl, add the water and then cover them and leave them overnight. The next day, the solution can be put into small bottles and sprayed either into the air or on to your skin.

2. Amaze
For this, you will need some distilled water, vodka, hypericum perforatum, cypress and rosemary (all of which are essential oils). They should then be mixed together and stored overnight.

After a period of 12 hours or more, the solution produced can be put into a dark spray bottle to be used. Using a dark colored bottle will help the solution to remain fresh, which will be felt by the person using it when they apply it to their skin.

3. Whispering Rain
This is another recipe that may be worth trying out. Again, you will need distilled water, some vodka, Sandalwood, Bergamot and Cassis essential oils (which can also be purchased as fragrance oils).

For this recipe, you will need fragrance oils such as Sandalwood, Cedar Wood, Bergamot, Vodka and a little touch of Vanilla. All these ingredients should be put into a jar and then shaken. It should then be put in a cool place and left for a
week. After this time, you can then transfer the mixture into small perfume bottles.

These ingredients should be stirred together and then stored overnight in a covered container. Then, the next day, it can be transferred to a dark colored bottle. This perfume must be kept in a cool place so that it does not dry up.

The three perfumes above normally last for about a month before they lose their scent.

Tip 2. Put your perfume in a dark- colored bottle and must be kept in a cool dry place to make its shelf life much longer.

French Perfume Oil

Ingredients
1. 1/2 ounce (7 grams) sweet almond oil
2. 15 drops lavender essential oil
3. 10 drops sandalwood essential oil

Instructions
1. Sterilize a small dark glass perfume bottle. Add all ingredients and mix.

This perfume will be good for six months. Store it inside the bathroom cabinet-out of sunlight.

Citrus Splash

Ingredients
1. 2 cups distilled water
2. 3 tablespoons vodka
3. 15 drops sweet orange essential oil
4. 10 drops Bergamot essential oil (extracted from orange trees)
5. zest of one lemon

Instructions
1. Sterilize a canning jar in boiling water. Allow to dry or dry carefully without touching inside of jar.
2. Put lemon zest in the jar. Pour water and vodka over zest.
3. Stir with a stainless steel spoon. Add essential oils, seal and put in cool, dark place for one week.
4. Swirl contents every other day. strain liquid through cheese cloth or coffee filter. Put perfume water into dark (blue or amber) decorative bottle.

This perfume will be good for a year.

How to make Aromatherapy Perfume.

First, you need a base. It can either be alcohol or a carrier oil (but the best is a mixture of the two together). The best type of alcohol to use is one which is odorless (say vodka) and mix this with Jojoba. Jojoba is particularly good, as it has a long shelf life, and once it is put on the skin, it tends to dry out and leave a wonderful scent behind.

However, jojoba is one of the more expensive carrier oils, and I would suggest you experiment with one of the cheaper ones (such as almond or apricot kernel oil) instead. Then, once you are happy with the product you are producing, you can produce the same product but with jojoba oil instead.

The equipment you will need for making aromatherapy perfume is as follows:-

1. Measuring Spoons (Any good kitchen store will have these)
2. Small Funnel (Can be purchased at any good DIY or hardware store)
3. Small Colored Bottles (Look around your local stores or carry out a search on the internet)
4. Dropper (not all essential oil bottles have one of these included with them).

Now we will provide you with the instructions for producing your first batch of aromatherapy perfume.

1. 1 teaspoon of carrier oil (Jojoba, Almond or Apricot Kernel) and 1 teaspoon of
alcohol (Vodka), and with the small funnel, place these in the bottle.

2. Next, add the essential oils from your chosen recipe (below you will see a number of different recipes, with the quantities of essential oils you require for them). You may need to get a dropper, as not all essential oil bottles come with one, and add a drop at a time.

3. After adding each drop of essential oil to the rest of the mixture, the bottle should be shaken (remember to put the lid on first before shaking).

4. Once you have finished adding the last drops of essential oil and shaken, make
sure the lid is on tightly, and store in a cool dark place for 12 days or more. However, each day you should remember to give the bottles a shake at least 3 times.

5. After 12 days you can begin to enjoy the aromatherapy perfume that you have made.

The first recipe below is specifically for those women who may suffer from nerves on their wedding day, and will help to feel much more relaxed and calm on their big day.

All you need to make this recipe is:-
a. 4 drops Jasmine
b. 2 drops Lemon
c. 1 drop Patchouli

The following recipes have been designed to help produce a much more calming effect to the person using them. These perfumes will help to focus you on your inner self, and provide you with a feeling of security, which will promote a feeling
of total relaxation.

1. Tranquility
4 drops of Cedarwood
2 drops of Clary Sage
1 drop of Grapefruit
2 drops of Mandarin

2. Chill Out
2 drops of Grapefruit
2 drops of Patchouli
1 drop of Rose
3 drops of Vetivert
2 drops of Ylang-Ylang

3. Sleep Tight
2 drops of Bergamot
3 drops of Chamomile
2 drops of Marjoram
4 drops of Lavender

4. Silence
3 drops of lavender
3 drops of Neroli
2 drops of Spearmint

The next recipes we are looking at will enhance a person’s mood and feelings of well-being. These perfumes will help to relax and surround you with warmth, as well as a feeling of pure luxury for those special nights out or at home with your loved one.

1. Ardour
3 drops of Jasmine
3 drops of Neroli
4 drops of Orange

2. Devotion
1 drop of Clary Sage
3 drops of Patchouli
2 drops of Rose
4 drops of Rosewood

3. Tenderness
2 drops of Linden Blossom
3 drops of Lime
2 drops of Neroli
3 drops of Sandalwood

4. Zeal
4 drops of Melissa
2 drops of Rose
2 drops of Ylang-Ylang

The Smell of the Orient
Ingredients
1. 4 drops of Sandalwood
2. 4 drops of Musk
3. 3 drops of Frankincense
4. 2 teaspoons of Jojoba oil (carrier oil to be used when using essential or fragrance oils in perfume making).

Directions
1. Mix all of the ingredients together in a bottle and shake well.
2. Place them in a dark colored bottle, and then allow the perfume to settle for at
least 12 hours.
3. Once it has been stood for 12 hours or more, you should now store it in a cool dry area.

The next recipe we are looking at is in fact not a perfume, but a cologne, and contains lemon as the main ingredient.

Ingredients
1. 1 cup of distilled water
2. 1 cup of Vodka
3. 3 drops of Lemongrass
4. 10 drops of Lavender
5. 10 drops of Lime

Directions
1. Combine the essential oils with the vodka in a bottle and shake well.
2. Now set this aside for 3 weeks.
3. After 3 weeks, you will need to add the distilled water and then let it stand for a further week.
4. It is important that you shake the bottle once a day while it is standing over the 4 week period.
5. After 4 weeks, you can transfer the mixture to dark bottles for storage, or keep the mixture in the bottle it is in, in a dark cool place.

The final recipe provided below is one which will produce a body splash, rather than a perfume, and has a citrus aroma to it.

Ingredients
1. 2 cups of distilled water
2. 3 tablespoons of vodka
3. 1 tablespoon each of lemon and orange peel (which must have been finely chopped)
4. 5 drops of Lemon Verbena
5. 10 drops of Mandarin
6. 10 drops of Orange

Directions
1. Mix the fruit peels with the vodka in a jar, cover and let it stand for 1 week.
2. After the week, strain the liquid and add the essential oils and distilled water to
it.
3. Now let the mixture stand for a further 2 weeks, and make sure you shake the jar well once a day during this time.
4. Place the final solution after the 2 weeks in a dark bottle(s), or keep it in a cool
dark area.

Tip 3. Put your homemade perfume in a nice vintage perfume bottles, they will certainly provide you with an individual look that cannot be found when buying perfumes that have been mass produced.

One of the best ways of selling your own perfume is through your friends, families and co-workers; you may also use them as giveaways for weddings and other special occasions. If you are marketing the products to teenagers, it’s better to put your perfume in spray bottles. If you are targeting office workers, however, putting the perfume in roll-on bottles would be a better option. Avoid using plastic as packaging material; they have dioxins that may mix or interact with your perfume.

As you can see making your own perfumes, colognes or body sprays is simple, and once you’ve made your first lot and tried it yourself, you will soon want to be making more.

Sources: from ebook How to Make your own Perfume, entrepreneur.com.ph

How to Make Skinless Longganisa


Skinless longganisa or longanisa (Filipino-style sausage) is a popular viand that you can find in most dining tables of Filipino families. Longganisa comes in different versions from the different regions of the country, i.e. with vinegar like in Vigan, or with oregano like in Lucban.

Longganisa/ longanisa recipe

Meat Ingredient:
- 1kg. Pork lean, ground finely (700 gms)
- Pork fat, ground finely (300 gms)

Extenders:
- In 1/2 cup water add 1/4 cup textured vegetable protein (TVP).
- Hydrate for 3 minutes.
- Add 1 Tbsp Isolate and 1/2 tsp Carageenan

Curing Mixer:
- 1 Tbsp – Salt, refined
- 1/2 tsp – Curing salt
- 1 tsp – Phosphate, dissolve in 1/4 cup water
- 1/4 tsp – Vitamin C powder

Seasonings:
- 3/4 cup – Sugar, refined
- 2 Tbsp – Garlic, chopped finely
- 2 Tbsp – Anisado wine
- 1/4 cup- Pineapple juice
- 1/2 tsp – Vetsin (MSG)
- 1 tsp – Food color dissolve in 1/2 cup of water
- 1/2 tsp – Meat enhancer
- 1 tsp – Paprika powder
- 1/2 Tbsp – Black pepper, ground

Procedure:

1. Select good quality raw materials.
2. Measure and weigh all the ingredients
3. Mix the curing ingredients continuously.
4. Add the rest of the ingredients. Mix until well blended
5. Cure at room temperature for 8-10 hours or refrigeration temperature for 1 day
6. Wrap in paperlyne or cut wrap (2 T per piece)
7. Pack in polyethylene bag 1/4 kg. (should have six pieces of skinless longanisa)
8. Store in freezer for 1 day only

Packaging materials:

- Polyethylene bags: Size – 4″ x 8″ ; Thickness – 0.003
- Styrofoam, rectangular in shape with cling on top

Vigan Longganisa, Homemade Skinless Longganisa

Vigan longganisa are garlicky, sourly and salty with the distinct pungent aroma even in its uncooked state. It is made up of lean pork meat compared to Pampanga version which are sweet.

Vigan longgnisa are not readily available elsewhere outside Vigan, the authentic Vigan longganisa are only produced in limited quantities by the manangs of this old City. Recipe found in overseas pinoy cooking.

source: elgu2.ncc.gov.ph. Photo: pampangasbest.com.ph.

Fish Siomai Recipe


Siomai, shumai or shaomai, a traditional Chinese dumpling served in dim sum, has gained widespread acceptance among Filipinos. One variant of siomai that has been gaining popularity recently is fish siomai wrapped in nori sheets instead of wonton wrappers.

While siomai is of chinese origin, their consumption is nowadays widespread and can be seen in many Philippine business food stalls and restaurants serving siomai either in steamed or fried with chili garlic dip sauce.

Siomai food cart business offers a healthy, cheaply treat for students and employees on the go.

Fish Siomai Recipe

Meat Ingredient:
* 1 Kg Fish, flaked tilapia, labahita (sturgeon fish) or pangasius known for its fine flake, sweet flavor, white flesh.
* 2 packs Nori or molo wrapper

Curing mix:
* 1 tbsp salt, refined
* 1 tsp Phosphate
* 1/2 tsp curing salt (optional)
* 1/4 cup chilled water

Extender:
* 1/4 cup TVP
* 1/4 cup Qualicel, vegetable fibers obtained from fiber-rich parts of the bamboo plant.
* 1/2 cup Versagel, is a whey protein gel.
* 1 1/4 cups water
- If qualicel and versagel are not available, you can also use 1/2 cup carageenan.

Seasonings:
* 1/2 tbsp Black or white pepper, ground
* 2 tbsp Garlic, chopped (or 2 t garlic powder)
* 3/4 cups carrots, shredded
* 1/2 cup young onion, chopped finely
* 1 pc egg medium size
* 3/4 cups grated cheese
* 1 tsp paprika
* 2 tbsp sesame oil
* 1/2 tsp Meaty ginisa (optional)
* 1 tsp BF blend

Procedure:
Step 1. For the curing mix, dissolve all the ingredients using the chilled water. Set aside.
Step 2. For the extenders, dissolve all the ingredients in a bowl and set aside.
Step 3. For the seasonings, combine it in a separate bowl and make sure to mix all the ingredients well.
Step 4. Then, add the fish meat to the curing mixture and mix well. Then, mix in the extenders. Transfer the meat mixture into the bowl with seasonings. Mix everything well.
Step 5. Add the egg and combine it well into the siomai meat. Set aside.
Step 6. Lay out the wrappers in a clean tray and put two teaspoonfuls or about 10g of siomai meat on each wrapper.
Step 7. To fold the wrapper, gather up its edges and gently pleat it using your thumb and point finger.
Step 8. Make sure to stick the wrapper to the meat while pleating it. Then press the top with your other thumb.
Step 9. Garnish the siomai with shredded carrots on top. You may now steam these siomai for 30 minutes or pack them before storing in the freezer. It can be kept frozen for a month but if not refrigerated, it can only last for three days.

Fish Siomai Chili Sauce

Ingredients:
1/2 cup oil (canola, olive oil, peanut oil etc.)
1 tbsp dried chilies (or chili flakes)
1/8 tsp ground cumin (optional)
pinch salt

Procedure:
1. Heat oil then add chilies.
2. Cook over low heat until chilies turn brown
3. Add cumin and salt (if desired).
4. Cool and transfer to a small sterile jar.

Additional Siomai Cooking Tips:
(Excerpted from foodbytesforum)

- To make a red on top of the siomai, use duck egg yolk mixed with orange food color and starch instead of using crab fat.
- Onion is optional because it shortens the shelf life of the siomai.
- Optional extender -bread crumbs (but best extenders are singkamas and carrots).
- Don’t beat the egg, just mix it on the meat.
- Grind carrots, singkamas, onions and shrimp (optional) together with the meat.
- Put a cheesecloth before you put the cover of the steamer, it will absorb the water drippings inside and moist that could ruin your siomai.
- Use only fresh meat.
- Try the basic recipe first and then experiment with it until you get the flavor combination that you like.

Where to train and buy ingredients:

Ultima Entrepinoy Forum Center
Nutrition Foundation of the Philippines Bldg., 107 E. Rodriguez Sr. Ave., Quezon City
Telephone: (02) 411-1349; (02) 742-7866
Website: www.spicesandfoodmix.com

Sources: DZRH Agritech: Fish Siomai Making, entrepreneur.com.ph, foodbytesforum.com Photo: manilafoodfinds.blogspot.com

How to make Homemade Chocolate


Chocolate is perhaps the most desired sweet on the face of the planet, enticing people from all over the world to have that sinfully delightful bite, that deliciously taste of darkness and sweetness, that unmistakably and absolutely irreplaceable chocolaty experience bursting in their mouth.

Chocolate candy makes a perfect gift during valentines season, and a great giveaways at weddings, as party favors, or simply as desserts. And another good thing is they’re easy to make, as chocolate candy molding involves only a three-step process: melting, pouring, and setting.

Chocolate Candy Recipe

Materials:

Pan
Stainless or heatproof bowls
Plastic molds (local ones are priced at P90 each while an imported one starts at P120)
Wooden and stainless spoons
Chopping board
Knife
Disposable plastic gloves
A clean cloth
Toothpick, lollipop stick, or plastic straw.

If you have the budget, you may also buy a double boiler and an artist brush for making designs on the chocolate mixture.

To make 44 pieces of almond shaped dark chocolate, you will need:

Bittersweet chocolate, P67 per 500 grams

Peanuts, P3.12 per 40 grams, for fillings. Other fillings may be raisins, marshmallows,walnut, pecans, almonds, or cashew nuts.

For packaging: Fluted paper cups, P10 per 100 pieces

Boxes sized 3.5 x 5.5 x 1 inches, P40 per 10 pieces

Chocolate Candy Procedure:

1. Make sure all your utensils are clean and dry. Put on your plastic gloves and cut the chocolate block into small pieces so they melt faster. Place the chocolate blocks in a pan small enough to fit inside the boiler. If you don’t have a boiler, just use a bigger pan that can accommodate the pan for melting chocolate.

2. Place the boiler containing water over the stove and let the water simmer.

3. When the water simmers, put the pan containing the chocolate blocks inside the boiler, taking care that the water level doesn’t reach the pan’s rim. Stir constantly using the wooden spoon until the chocolate melts completely and becomes smooth and thick.

4. Pour the melted chocolate onto the mold or heatproof plastic containers. Use the stainless spoon to scrape off the sides of the pan.

If you want fillings like nuts, marshmallows, rice crispies, dried fruits, or raisins, pour a tablespoon of chocolate first, then the filling of your choice, and coat with another spoonful of melted chocolate. Tap the mold or use regular straw to fix the fillings and remove air bubbles from the chocolate mold. Make sure the mold is fully covered.

5. Cool for a few minutes and then put the chocolate mold inside the freezer for three minutes. When the three minutes are up, remove the mold from the freezer. Turn a mold upside down on a flat surface and tap gently to remove the candies. (Another way to find out if the candies are ready is to see if the sides of the mold have turned white or cloudy.)

If the chocolate doesn’t come off easily, return the mold to the freezer to allow it to harden more.

6. Place the candies in fluted paper cups and arrange them in a box. Decorate box with ribbon and card. The chocolates can last up to two weeks.

Source: entrepreneur.com.ph
Photo: treehugger.com

How to make Siopao Steamed and Pork Burns

Siopao is a steamed rice-flour bun consisting of a meat filling inside which could be either asado or bola-bola that may use pork, chicken, beef, shrimp and salted duck eggs. These buns are cooked in steamers available in sets of two or three racks.

Siopao is a popular food item among Filipinos. A lot of Filipinos are searching for siopao recipe that is easy to follow step-by-step. Here is a simple siopao recipe that you can try in your home.

Siopao Ingredients:

* 6 cups flour
* 1 package active dry yeast
* 1 lb cubed pork loin or chicken thighs
* 1 cup white sugar
* 2 teaspoons cooking oil
* 1 cup lukewarm water
* 1/2 cup boiling water
* 6 hard-boiled eggs
* 2 green onions
* 4 teaspoons light soy sauce
* 4 teaspoons brown sugar
* 4 teaspoons oyster sauce
* 1 teaspoon cornstarch, dissolved in 2 t. water
* 2 cloves garlic
* 3 teaspoons salt
* 6 teaspoons baking powder

Siopao Cooking Instructions:

Siopao Dough:
- Mix flour, salt and baking powder in a medium bowl, set aside.
- In another bowl dissolve yeast in lukewarm water then add 1 cup of the flour mixture.
- Mix thoroughly.
- Cover with a cloth and let rise 1 hour.
- Meanwhile, dissolve the white sugar in the boiling water.
- Stir well then let cool to lukewarm.
- Pour into the yeast mixture, then add the rest of the prepared flour mixture.
- Stir to blend well.
- Grease a large bowl.
- Turn dough out onto a floured board and knead for 3 minutes-you want your dough smooth, not sticky.
- Place ball into bowl, turn once and cover with a damp cloth.
- Let rise 2 hours or until doubled.

Siopao Filling:

- Saute the garlic and onions in a small amount of oil in a wok.
- Add meat and stir fry for 1 minute or until meat is no longer pink.
- Add soy sauce, oyster sauce and brown sugar.
- Pour in the dissolved cornstarch and stir fry quickly until meat is glazed well.
- Remove from heat and let cool.

How to make Siopao:

- Punch down dough and knead on a floured board for 3 to 5 minutes.
- Divide dough and roll each half into a 12×2 inch log.
- Cut each into 12 pieces, making 24.
- Roll each piece into a ball using your hands then rolling it flat into a 3 inch diameter circle.
- Dust with flour if needed to prevent sticking.
- Place 1 slice of egg into center of dough round, then 1 T. of filling with sauce.
- Gather sides of round, pinch together and twist.
- Place pinched side down on parchment paper and place in steamer.
- Repeat until done.
- Cover with a damp cloth and let rise for 1 hour.
- Steam Siopao for 20 minutes.
- You can freeze cooked Siopao, simply re-steam for 10 minutes.

Recipe found at pinoyrecipe.net, Photo: tsibog.com

How to make Homemade Preserves


Fruit preserves are fruits, or vegetables, that have been prepared and canned for long term storage. The preparation of fruit preserves traditionally involves the use of pectin as a gelling agent, although sugar or honey may be used as well. Depending upon which ingredients are used and how they are prepared will determine the type of preserve; jams, jellies and marmalades are all examples of different styles of fruit preserves that vary based upon the ingredients used.

Packing Fruits

Raw Pack (Cold Pack)- Pack raw fruit into jars and cover with boiling hot sugar syrup, juice or water. It is necessary to leave a head space between the lid and the top of food or liquid. This space is needed for the bubbling of liquids and fruit expansion. If the jars are filled too full the contents may overflow during processing. The amount of head space is usually between 1/8 and 1/2 inch. Check the individual recipe for the exact amount of head space.

Hot Pack- Heat fruit in syrup, in water or over steam before packing. Fruits with a high juice content and tomatoes can be pre-heated without adding liquid and then packed in the juice that cooks out.

To Fill Jars- Pack each jar to within 1/4 inch of top or as specified in individual recipe. For non-liquid foods(ie. peaches) it is necessary to remove any trapped air bubbles by running a rubber spatula or table knife gently between the solid product and the edge of the jar. Add more hot syrup as needed. Wipe rim and screw threads with a clean damp cloth, place lid on top and screw bands on tightly and evenly to hold rubber sealing lid (or sealing ring) in place. Sometimes it is necessary to position and hold down sealing lid while you tighten the band to insure the lid is centered on the top of the jar. Do not over-tighten. Jars are then ready to be placed on the rack inside hot water canner.

Processing Fruit Preserves and Pickles

Water Bath Method- The boiling water bath method is safe for tomatoes, fruits, jams, jellies, pickles and other preserves.

Place jars on rack immediately after packing. Lower filled rack into canner. Jars should be covered by 1 to 2 inches of water. Add additional boiling water if needed. If you add more water, pour between jars and not directly on them (this is where the extra pot of heated water comes in handy). Cover pot with lid. When the water comes to a rolling boil, start to count the processing time. Boil gently and steadily for the time recommended for the food being processed. When the cooking time is up, remove jars at once and place on a rack or on towels away from heat and away from any draft.

Test for Seal

After jars have cooled between 12 and 24 hours after processing, check seal. To do this press down on the center of the lid. The lid should be con-caved and not move when pressed. Another method is to tap the lid with the bottom of a teaspoon. If the jar is sealed correctly, it will make a high-pitched sound. If it makes a dull sound it means the lid is not sealed or possibly that food is in contact with the underside of the lid. Do not be alarmed if during the first the first hour or so of cooling if you hear a popping sound come from the jars. This is a good sound to hear as it most often means that the vacuum effect has taken place which causes the lids to pop down and seal.

After jars have cooled thoroughly, the screw bands may be removed if desired. Be sure to label canned jars with content and processing date. Store jars in a cool dark, dry place.

How to Make Sugar Syrup

Ingredients
Light Sugar Syrup- 2 cups sugar and 4 cups water
Medium Sugar Syrup- 3 cups sugar and 4 cups water
Heavy Sugar Syrup- 4 3/4 cups sugar and 4 cups water

Procedure: To prepare syrup, while heating water, add sugar slowly, stirring constantly to dissolve. Bring to a gentle boil. Fill jars while syrup is still boiling hot.

Some Homemade Preserves and Pickle Recipes for your Business.
Strawberry Jam Recipe
“This is by far the easiest recipe I have found for strawberry jam without using a pectin. The jam is soft, spreadable and delicious.”

Keep in mind, though, that other similarly pulpy and juicy fruits can also be made into jam.

Ingredients
* 910 g fresh strawberries, hulled
* 800 g white sugar
* 60 ml lemon juice

Directions

1. In a wide bowl, crush strawberries in batches until you have 4 cups of mashed berry. In a heavy bottomed saucepan, mix together the strawberries, sugar, and lemon juice. Stir over low heat until the sugar is dissolved. Increase heat to high, and bring the mixture to a full rolling boil. Boil, stirring often, until the mixture reaches 220 degrees F (105 degrees C). Transfer to hot sterile jars, leaving 1/4 to 1/2 inch headspace, and seal. Process any unsealed jars in a water bath. If the jam is going to be eaten right away, don’t bother with processing, and just refrigerate.

To test for jelling- Place three plates in a freezer… after about 10 minutes of boiling place a tsp of the liquid of the jam onto the cold plate. Return to freezer for a minute. Run your finger through the jam on the plate… if it doesn’t try to run back together (if you can make a line through it with your finger) it’s ready to be canned! Recipe by Katharine found at Allrecipes.com.

Production Cost & Pricing

To compute for production cost, divide the buying price per kg of each of your ingredients by 1,000, then multiply result by the volume you actually used in making the product. For example, white sugar is P38 per kg. Divide that amount by 1,000 to get the cost per gram (a kilogram is equal to 1,000 grams). You will get a quotient of P0.038 per gram, which then has to be multiplied by 250g, which the actual amount of sugar you mixed with the jam. Do the same arithmetic for the rest of the ingredients. Add up the results to get your total production cost.

Add to this sum the cost of the bottle and add 10 percent for your overhead costs (electricity, gas and water).

You may price the jam at P80 to P100 per 230g bottle. However, depending on your market, all-natural fruit jams may be priced from P150 to P200 per 230g bottle. You may choose to just add 100 percent profit margin to your total cost.

Dill Pickles Recipe

Ingredients
* 8 pounds 3 to 4 inch long pickling cucumbers
* 4 cups white vinegar
* 12 cups water
* 2/3 cup pickling salt
* 16 cloves garlic, peeled and halved
* 8 sprigs fresh dill weed
* 8 heads fresh dill weed

Directions

1. Wash cucumbers, and place in the sink (I use the bathtub!) with cold water and lots of ice cubes. Soak in ice water for at least 2 hours but no more than 8 hours. Refresh ice as required. Sterilize 8 (1 quart) canning jars and lids in boiling water for at least 10 minutes.

2. In a large pot over medium-high heat, combine the vinegar, water, and pickling salt. Bring the brine to a rapid boil.

3. In each jar, place 2 half-cloves of garlic, one head of dill, then enough cucumbers to fill the jar (about 1 pound). Then add 2 more garlic halves, and 1 sprig of dill. Fill jars with hot brine. Seal jars, making sure you have cleaned the jar’s rims of any residue.

4. Process sealed jars in a boiling water bath. Process quart jars for 15 minutes.

5. Store pickles for a minimum of 8 weeks before eating. Refrigerate after opening. Pickles will keep for up to 2 years if stored in a cool dry place. Recipe by Sharon Howard at Allrecipes.com

Packaging Fruit Preserves and Pickles

Use labels that will appeal to your target market. If you’re targeting kids, the labels must be colorful and attractive. If you’re targeting health buffs, it would be good to make the label carry health tips and cite the nutritional benefits of the fruit.

How to Register your Homemade Preserves and Pickle Business?
Click here for the steps on How to Register your Business. (Tagalog Version)

Where to Sell your Homemade Preserves and Pickles?

1. Sell it to your friends, relatives and neighbors. They will be your bases if your product is ready for a bigger market.

2. Join food trade shows and bazaars. This will gain enough visibility to leverage and showcase your homemade fruit preserves. Make sure you have different products to offer.

3. Sell it to grocery stores. Focus on the consumer first through grocery exposure, and then impacting them through restaurants and other food places.

Sources: canning-food-recipes.com, entrepreneur.com.ph, allrecipes.com, Wikipedia
Photo: wikipedia

How to start a Donut Business


Starting a donut shop business is a good business venture idea for it has a wide-range of market customers. That means, excellent profit margin. This is one of those businesses with a universal customer base. Customers come in all ages and all walks of life, including men, women and children from every ethnic background and socio-economic classes.

When starting your own donut shop business, you have two approaches to consider. The first approach is to open a traditional, sit-down style donut shop that serves customers donuts, muffins, coffee, tea and hot chocolate. The second approach is to establish a commercial donut bakery that’s not open to the public, but specializes in making donuts for wholesale to grocery stores, school cafeterias, catering companies, food stalls and restaurants.

Donut Shop Location

Select a location with a high level of foot traffic. This is essential in malls, near school campuses, parks and office buildings where lots of people are passing by. Make sure to determine what competition you have in the area to ensure your business.

Business Permit

Register your donut shop business and obtain any necessary business permit. Visit the nearest Department of Trade and Industry (DTI) to register your business and to other agencies to get other permits you will need. The permit may vary depending on what food and beverage items you’re selling. It is also important to get a sanitary permit from your local health agency to ensure the cleanliness of your area.

Visit How to Register Your Business.

Business Tips:

a) To attract more customers, try to include healthy donut options to the menu such as donuts and muffins made from whole grains or low fat pastries, fruits and healthy fruit beverages. You may also include nutritional information on menu items. Make sure you have something unique to offer for your customers. This will differentiate you from other donut businesses.

b) Make your packaging attractive to the palate. The packaging is essential in attracting more customers to buy your products. Make a research and try different possible packaging layout and color combination until you come up with a winner! It would be great If you can hire a layout designer for your packaging.

c) Make excellent customer service a priority. Bad customer service will ruin your business and makes your customers to never come back again.

d) Try to keep your products fresh at all times. This includes donuts and other pastries, beverages especially coffee and hot chocolates.

e) Give discounts to your customers. Reward your frequent customers with freebies and discounts. This will keep them coming back and eventually become your potential loyal customers.

Recipe for Basic Cake Donuts
Ingredients:
* 4 1/2 c flour
* 4 tsp baking powder
* 1 tsp freshly grated nutmeg
* 1/2 tsp salt
* 2 eggs
* 1 c sugar
* 2 Tbs unsalted butter, melted
* 1 c milk
* 1 tsp vanilla

Procedures:

Step 1. Sift together the dry ingredients.

Step 2. Beat eggs with sugar until light. Add butter, milk, and vanilla. Add dry ingredients and mix until a soft dough is formed. Do not over mix. If dough is too soft to roll, chill it for an hour.

Step 3. Roll dough out 3/8 inch thick on a floured surface and cut with donut cutters. Fry in 370 degree oil until golden on both sides, turning once.

Step 4. Remove from oil, hold over hot oil for a few minutes to drain, and then finish draining on absorbent paper. While still warm shake in sugar, sugar- cinnamon mixture, dip in glaze of choice, or dust with powdered sugar. 3 dozen

There are, however, many recipes for each of these things. One of the best plain glaze recipes follows:

1/3 c boiling water mixed with 1 c confectioners sugar. Mix well and dip warm donuts in mixture.

To coat with nuts- after dipping donut in glaze, roll in chopped nuts, or even sprinkles.

To coat with sugar easily- put sugar or cinnamon sugar mixture in a paper lunch bag. Put warm donut in and shake.

Recipe found at How to Make Delicious Homemade Donuts by Marye Audet.

Here are some free Business plan you can follow:
- Specialty Baker Business Plan
- Bakery Business Plan
- Dessert Bakery Business Plan

Sources: entrepreneur.com, hubpages.com Photo credit: Marye Audet

How to make Polvoron

Polvoron has become one of the most sought-after items and a favorite gift to give to overseas friends and family. It is primarily made with toasted flour, powdered milk, sugar and melted butter pressed in a special mold.


There is such a huge demand for polvoron that in a survey conducted by the Business section of the Philippine Daily Inquirer last 2007, Goldilock’s Bakeshop named polvoron as their top-selling item—it sold more than their cakes! Polvoron comes in different flavors like Pinipig, Peanut, Pili, Cashew, Cookies & Creme, Classic, and Chocolate.

Special Polvoron Recipe

Materials needed:

Mixing bowl
Measuring cups and spoons
Wooden spoon
Saucepan
Japanese paper or cellophane
Polvoron molder

Polvoron Ingredients:

4 cups all-purpose flour
2 cups powdered milk
1 1/2 cup melted butter
2 cups sugar

Procedure on how to make Polvoron:

1. On a pan, toast flour in moderate heat for about 15 minutes, or until light brown, stirring constantly to avoid burning.

2. Remove the pan and transfer the mixture into a big bowl.

3. Add the powdered milk, and toss for another 3-4 minutes.

4. Add sugar and melted butter. Mix well.

5. Fill the polvoron mould with the mixture, press it hard by using a spoon, then release it. If it is still too loose, add more butter or olive oil. Make sure that you could pick up the polvoron without it crumbling straight away.

6. Place the polvoron in an airtight container, then chill in the fridge until firm.

7. Carefully wrap the polvoron individually in japanese paper or cellophane.

8. Keep the polvoron refrigerated until you want to eat them. You can store them on the fridge for about a week, or you can freeze them.

Polvoron Recipe 2

Polvoron Ingredients:

1 cup plain flour
1 1/2 cup full cream powder milk
1/2 cup sugar ( preferable very fine sugar)
1 cup melted butter or half margarine half butter
1/2 teaspoon salt
1/4 cup roasted pinipig

Polvoron Preparation:

Step 1. Roast the flour in a wok (slow heat to avoid burning)

Step 2. Roast flour until it is slightly brown

Step 3. Take it off the heat

Step 4. Mix milk, sugar, pinipig, salt and melted butter with the flour

Step 5. Blend them together

Step 6. Try your molder. Mold one and if it is still too loose, add more butter to it. make sure that you could pick up the polvoron without it crumbling straight away

Step 7. Wrap them with papel de hapon.

Try this simple polvoron recipe and sell it to your friends, stores and even to pasalubong shops to make an additional income into your pocket. This can be a great business idea after all.

Sources: entrepreneur.com.ph, duyan.com Photo: filipinasoul.com

How to make your own Banana Chip


Banana (raw) is very low in Saturated Fat, Cholesterol and Sodium. It is also a good source of Dietary Fiber, Vitamin C, Potassium and Manganese, and a very good source of Vitamin B6. Raw bananas are good to make banana chips for snacks or you can make this as a business and sell in to local stores or tourist food shops. This is a great way to earn extra moneytoo.

Banana Chips

Ingredients:
• 5 Raw Bananas (saba) (peeled)
• Oil for deep-frying
• Salt to taste
• Brown Sugar (for sweetened chips)

How to make Banana Chips:

1. Easily peel the bananas and put it in salted iced water.
2. Chop the bananas thinly, around half a millimeter to one millimeter each slice.
3. Keep in water for 10 minutes and then drain out water completely.
4. Transfer to a kitchen cloth to remove the moisture.
5. Heat oil till it starts fuming.
6. Deep-fry the slices till almost crisp. Add few slices at a time.
7. Prepare paste of 1/2 tsp water and 1/4 tsp salt.
8. Add this paste to oil. This will make the slices crispier.
9. Repeat the procedure for remaining slices.
10. Drain the chips on an absorbent paper.
11. Cool and store them in an airtight container.
12. If you want to make the sweetened kind, instead of salt in step 7., soak in your prepared sugar solution for around two to three minutes. Drain well in your colander.
13. Fry again in cooking oil until golden brown or when the bubbling ceases. Drain, and cool in trays with absorbent paper. Keep in sealed jars or plastic bags.

You can make lots of variation for your banana chips. You can make sweet banana chip, salted or other flavors you want.

How to make Ice Cream

Everybody loves to eat Ice Cream especially children. Almost any one, of all ages enjoy this desert’s cold, soft and rich flavor which just melts in the mouth as soon as the tongue touches it. Ice cream fills a useful place in homes throughout the country. Homemade ice creams are easy to make and you could incorporate an array of many flavor variations like nuts and fruits which make the ice cream a nutritious dessert.


You can make delicious homemade ice cream, as good as any premium ice cream brand, with these easy to follow homemade ice cream recipes:

One thing to note: It’s important to take note of the temperature of the ice cream all throughout the process, particularly during chilling and freezing.

Simple Homemade Ice Cream

Ingredients:
2 eggs
3/4 cup sugar
2 tablespoons cornstarch
1 cup milk
1 pint heavy whipping cream
pinch of salt
2 teaspoons vanilla

Procedure:

Using an electric mixer, beat the eggs for several minutes until thick and lemon colored. Add 1 cup of milk and blend into the eggs. Mix sugar and cornstarch in a large saucepan. Add egg/milk mixture to the sugar and cornstarch. Cook until thick (about 5 minutes) stirring constantly. Allow the custard mixture to cool to room temperature.

When the custard is cool, put into a freezer-safe bowl. Blend in cream and salt. Freeze for 2 hours or until slushy. Add 2 teaspoons vanilla. Whip for 5 to 10 minutes with an electric mixer. Return to freezer and finish freezing (several hours or overnight).

Variations:
After you have whipped the ice cream, fold in 1 to 2 cups of fresh or frozen fruit, nuts and/or chocolate before returning the ice cream to the freezer to finish freezing.

Here are some ideas for additions to your ice cream:
- Strawberries, Blackberries, Raspberries, Peaches, Cherries (or Maraschino Cherries), Chocolate chips, Butterscotch chips, Crushed Heath bars, Crushed peppermint candy, Chopped walnuts, Chopped pistachio nuts, Diced bananas, Coconut
- Chocolate chip cookie dough (drop into the ice cream by small spoonfuls and carefully fold in)
- Caramel or chocolate or fudge syrup (drop into the ice cream by small spoonfuls and carefully fold in)

Source: LeAnn R. Ralph, http://www.streetdirectory.com/travel_guide/3217/food_and_drink/how_to_make_homemade_ice_cream_without_an_ice_cream_maker.html


Easy Homemade Ice cream

Materials:
Bowls, Casserole, Grater, Large whisk, Measuring spoons and cups, Pocket-type thermometer, Steel paddle, Sieve screen, Stainless steel container, Weighing scale, Wooden bucket, Wooden ladle

Ingredients:
1 kg white sugar
½ kg skimmed milk
½ kg butter milk powder
600 g cassava flour
2 leaves pandan
7 kg table salt
4 egg yolks
2 cans 300-ml condensed milk
1 can 300-g cream
½ bar cheese
1 kg grated coconut, (approx. weight is 1/2 kg)
2 tablespoons food color (egg yellow)
3 tablespoons vanilla
7 teaspoons or 34.5ml rhum or brandy
¼ ice block, crushed

For the mango marmalade flavoring:
1 ½ kg ripe mango
½cup white sugar
1 teaspoon calamansi extract

Procedure:

Step 1: Measure all the required ingredients and put them in individual containers.

Step 2: Extract coconut milk from the grated coconut using 4 cups of water. This will be your first extraction–a substance that’s called kakang gata in Filipino. Set it aside. Then, extract more coconut milk from the same grated coconut, this time using 8 cups of water. To remove the coconut bits from it, filter the coconut milk after the extraction. Set the second extraction aside too.

Step 3: Separate the egg yolks from the egg white–we’ll only need the yolks. Beat the egg yolks, then mix them with the second extraction of coconut milk.

Step 4: Slowly add the skimmed milk and the buttermilk powder while mixing with a whisk. Some ice cream makers use either skimmed milk or buttermilk powder, but if you want to make your ice cream a bit more special, you can mix the two powders. You just need to maintain the required 1-to-1 proportion. After blending the mixture, set it aside. (Mixing milk and egg gives rise to custard.)

Step 5: Dissolve the cassava flour in 2 cups of water. Once the cassava flour is completely dissolved, filter it using a sieve or cheesecloth. Also set aside.

Step 6: Prepare the stainless steel container by spreading ¼ kg of white sugar at the bottom, which will help to avoid unnecessary coagulation of the cream. Then put the container inside the wooden bucket.

Step 7: Start the scalding process by boiling a gallon of water containing twisted pandan leaves for 5 minutes. Scalding, which helps dissolve the sugar, infuses the other flavors evenly, and improves the texture. It makes the ice cream creamier and smoother.

Step 8: After boiling the water, take out the pandan leaves and pour the water into the stainless steel container. Also pour in the cassava flour mixture and, using the steel paddle, continuously stir until the sugar dissolves and the mixture achieves a viscous (thick) consistency.

Step 9: Add the kakang gata as you continuously stir the mixture. Also pour in the custard mixture and stir constantly until it attains a paste-like viscosity. Dissolve the food color in a little bit of water, then also add to the mixture. Continue mixing until you achieve the right viscosity.

Step 10: To chill, cover the stainless steel container and put crushed ice in the wooden bucket. The ice should surround the stainless steel container and be above the level of the mixture inside the container. The chilling stage will only start when the temperature of the mixture reaches 40C to 00C. Chill for 2 hours or overnight.

Step 11: While waiting for the ice cream to be chilled, prepare the mango marmalade flavoring. Put 1 ½ kg minced ripe mango in a casserole together with ½ cup white sugar and a teaspoon of calamansi extract. Simmer in medium to low fire until the mango mixture becomes a thick syrup. Stir the marmalade to avoid scorching. Set aside to cool.

Step 12: After chilling the ice cream overnight, you can now freeze it by putting more ice in the wooden bucket. You need to put the crushed ice and the rock salt alternately. Using the paddle, compact the ice and the salt each time you put in more ice. Compacting lessens the air gaps that cause the ice to melt faster.

During the first freezing stage, the temperature should further drop to -180C to -200C. While freezing the ice cream, paddle the outer part of the mixture to prevent the frozen mixture from adhering to the sides before it can be stirred. The stirring process allows the cream mixture to expand.

Step 13: While still in the freezing stage, get the steel handbeater and start stirring the ice cream to let it expand. Once it expands to half of the container, mix in the following while continuously stirring the cream mixture: ¾ kg of white sugar together with the grated cheese, mango marmalade, condensed milk, cream, and vanilla.

Step 14: Add crushed ice and salt to the wooden bucket whenever necessary. As you stir the cream mixture, you will notice that the consistency will become thicker and creamier. You will also notice that it is expanding.

Step 15: Once the cream expands up to the brim of the container, add the rhum or brandy. Make sure to stir the mixture down to the bottom to distribute the flavor and the other ingredients evenly. Taste and adjust if necessary.

Step 16: You may now pack the ice cream in small containers like pint containers, small cups, half-gallon or gallon containers, and freeze the cream in these containers. Or, you may simply put the ice cream in the stainless steel container for final freezing.

During the final freezing stage, you need to cover the container tightly and add more crushed ice and salt in the bucket as well as on top of the container. Let it stay for 2 hours or until frozen.

Now your ice cream is ready for consumption. Keep it frozen until it is ready for serving. The shelf life of this ice cream product is 7 to 10 days, depending on the temperature fluctuations. If you can maintain the temperature between -180C and -250C, the shelf life of the ice cream would be longer and the quality would be better.

How to Make Special Puto


Puto is a steamed rice muffin which is popular as snack or dessert in the Philippines. In its traditional form, puto is of a plain white color. Adding certain common Filipino ingredients like coconut milk, ube and pandan (made from pandan leaves) slightly changes the flavor and completely changes the color of the finished product.

Some other variations of steamed rice muffin (Puto) are Puto Bumbong, Puto Calasiao, Puto Lanson, Puto Mamon, Puto Manapla, Puto Maya, Puto-Pao, Puto Seko, Puto ube and a lot more.

Making and selling puto and kutsinta are hit business opportunities because (1) they are ridiculously easy to make; (2) they require very little capital; (3) you can mark them up to as high as 300 percent but (4) they will still be affordable to the masses.

Special Puto Recipe

Materials:
Steamer
Mixing bowl
Strainer
Muffin pan
Measuring cups and spoons
Wooden spoon or wire whisk

Puto Ingredients:
2 cups rice flour
1/2 teaspoon salt
3 teaspoon baking powder
2 cups coconut milk
1 cup white sugar
1 teaspoon anise seeds (optional)
1 cup grated coconut (or coconut flakes)

Getting started:

1. Sift the rice flour, salt, baking powder and white sugar together.

2. In a bowl, add the coconut milk to the sifted ingredients and blend until the mixture is smooth.

3. Add anise seeds or whatever flavoring you wish (i.e. vanilla, pandan, etc.) Mix and blend thoroughly.

4. Carefully pour the mixture into the muffin pans (greased with butter beforehand), making sure you leave 1/3 space at the top. This is to give the puto space to expand upon cooking.

5. Steam for about 30 minutes.

6. Check for doneness by inserting a toothpick into the center of each puto—the toothpick must come out clean.

7. Top with grated coconuts.


Special Puto Cheese

Ingredients:
- 1/2 cup all purpose-flour
- 1/2 cup cake-flour
- 2 tsp. baking powder
- 1/2 tsp. salt
- 2 pcs egg yolks
- 3/4 cup white sugar, divided
- 1/3 cup water
- 1/3 cup evaporated milk
- 1/4 tsp. vanilla
- 2 pcs egg whites
- 2 tbsp. cheese, grated

Procedure: How to make Puto cheese

Step 1. In a medium mixing bowl, sift all purpose flour, cake flour, baking powder and salt three times. Set aside.
Step 2. Beat yolks until lemon colored. Add 1/2 cup sugar gradually and continue beating.
Step 3. Fold in flour mixture to egg yolks alternately with water and milk. Add vanilla. Set aside.
Step 4. Meanwhile, beat egg whites until soft peaks form. Add 1/4 cup white sugar and continue beating until stiff. Fold in egg batter. Blend well and pour mixture in a 9-inch cake pan.
Step 5. Sprinkle grated cheese on top. Cover with cheese cloth. Steam for 30 minutes or until a tester inserted in the center comes out clean.

Sources: entrepreneur.com.ph, wikipedia, filipinovegetarianrecipe.com
Photo: Puto Calasiao by shootfirsteatlater.com

Twitter Delicious Facebook Digg Stumbleupon Favorites More